
Star Wars Zero Company mission planning guide
Use Star Wars Zero Company mission planning to compare the Den, Holotable, Intel, squad health, objectives, Cycle pressure, and deployment decisions.
The direct answer
The safest Star Wars Zero Company mission planning routine is to return to The Den, inspect the Holotable, read the complete objective, check the squad’s health, and then decide whether the next action should be an Operation or a Tactical Mission. Look at the available rewards and the time pressure before you commit. A combat mission advances the campaign to the next Cycle, so the decision affects more than the battlefield.
Start by asking what the mission is asking you to do. A rescue, sabotage, extraction, defense, or elimination objective needs a different route and a different tolerance for combat. The objective appears in the interface and on the map, which gives you a concrete target before you spend Action Points or choose a squad.
The campaign layer also matters. The Den is where you manage the company between deployments, while the Galaxy Map presents strategic tasks and tactical missions. The full Cycle count for every release campaign is To be confirmed, but the connection between the strategic layer and the next tactical deployment is clear enough to plan around.
Use The Den before the Holotable
The Den is the preparation space for the company. Use the available facilities to deal with injuries, review Operators, adjust a build when the relevant option is unlocked, and handle conversations before launching the next mission. Talking with teammates can reveal more of their stories and can unlock missions with personal meaning to them.
The Holotable is the handoff point between preparation and deployment. Its campaign view separates non-combat Operations from Tactical Missions, so check both areas before selecting one. A mission or Operation that remains on the board may not remain available after the Cycle changes.
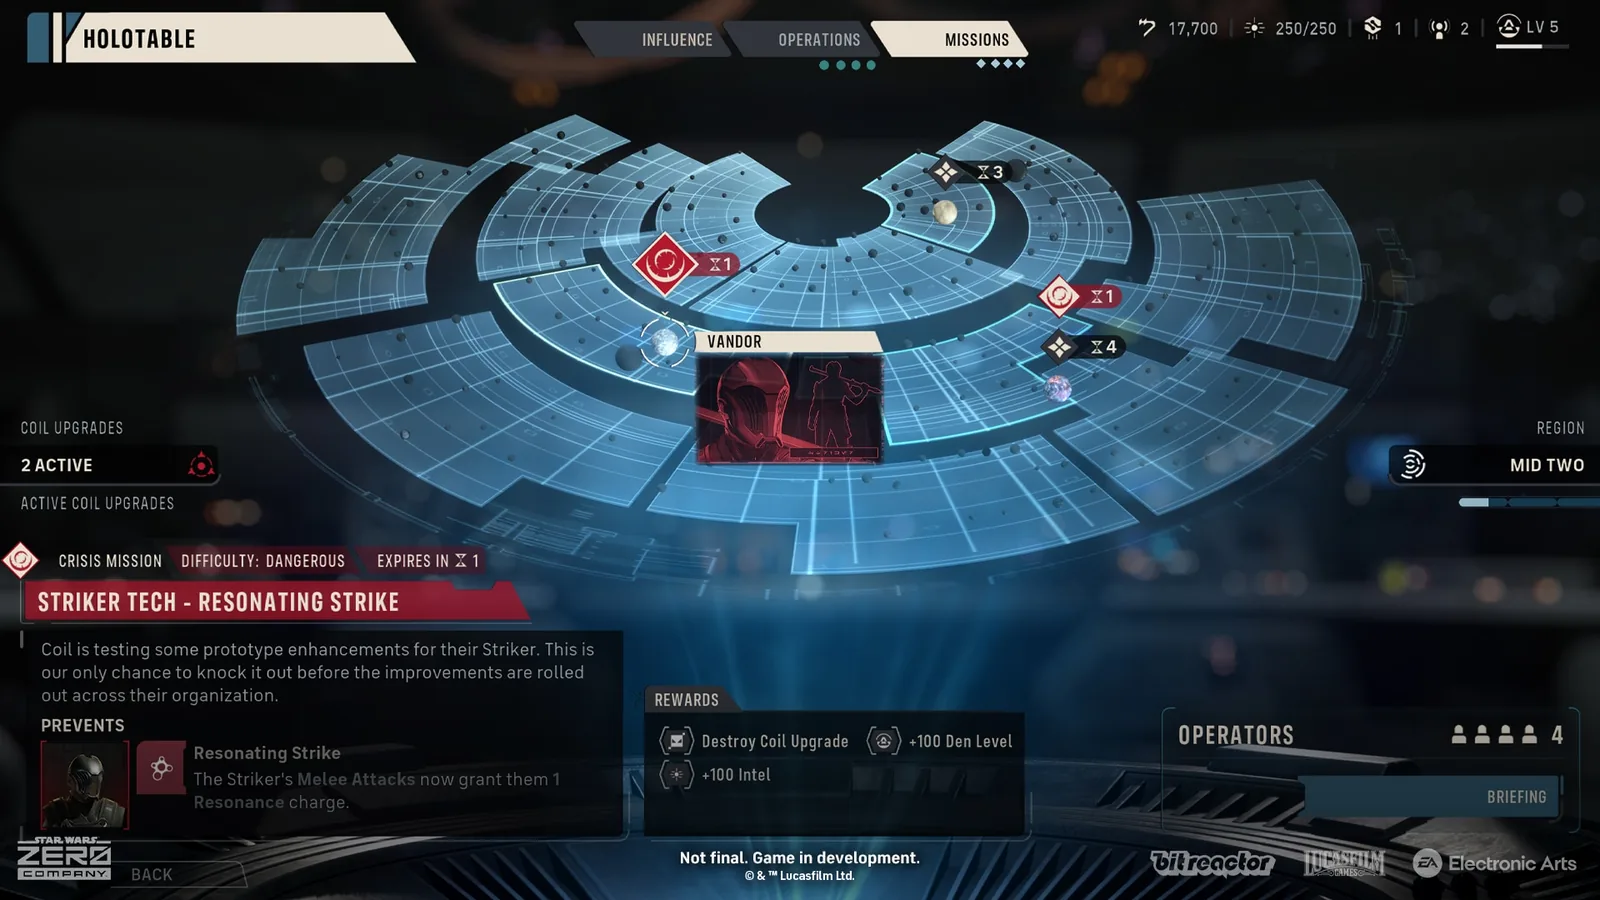
Operations can require Intel and can return rewards, information, or access to more content. Some also present a dilemma. The choice may affect character Bonds or side missions, but every Operation does not have the same relationship effect. Record the options shown in your run before treating one route as universal.
Read the objective before choosing a squad
Squad selection should follow the objective. A mission that ends at an extraction zone needs movement and a plan for the retreat. A defense objective rewards a protected firing lane and a way to hold a choke point. A rescue objective can fail when the protected target dies even if most enemies have already been defeated.
Health and availability are just as important as class coverage. Consider which Operators are healthy before harder jobs, and remember that a mission can be restarted from the menu. An injured Operator may still be useful, but deploying a damaged squad member can create a second problem when the map adds reinforcements or a timed retreat.
Action Points shape the first tactical decision. Each Operator normally has three Action Points per turn, and movement, attacks, abilities, and Overwatch compete for the same pool. Before the drop, decide which Operator needs to move first, who can spend points on a reaction attack, and which position will still be safe when the enemy turn begins.
Budget Intel, time, and relationships
Intel is a campaign resource used by non-combat Operations. Check the cost and the return before launching a Tactical Mission, especially when the next Cycle may remove an available option. An Operation can provide a reward immediately, add narrative context, or unlock another Operation or Mission, so its value is not limited to a single item.
Time pressure changes the meaning of a good reward. Operations and Missions can expire, while story-critical missions become obligatory after a period of time. You cannot assume that every available activity can be completed before the next deployment. If an option has a visible timer, write down what will disappear and decide whether the reward justifies spending the Cycle.
Bonds also belong in the plan. The game uses conversations, repeated squad use, and story choices to build relationships, while some Operations can strengthen or weaken them. Keep the pairings you care about in mind when choosing a mission, but do not promise a Bond result that the current game state does not display.
Convert the plan into a tactical turn
Once combat begins, keep the mission objective above the temptation to clear every enemy. You do not need to defeat all hostiles unless the objective explicitly requires it. Move from cover to cover, preserve a route to the next objective, and leave a reaction plan when the squad cannot finish the job in one turn.
Overwatch is most useful when an enemy must cross a lane or approach a protected target. Advantage is a shared combat resource gained through damage and spent on powerful actions, so the best plan usually creates a safe opportunity to build it before asking for a large effect. The right answer changes with the objective, the map, and the Operators available.
Do not end a turn with the whole squad exposed just because the next waypoint is visible. A shorter move that ends in cover can preserve the next turn’s options. If a mission has a rescue or extraction phase, keep enough movement and healing capacity for the protected unit instead of spending everything on optional targets.
A practical first-campaign routine
Choose a forgiving difficulty while learning the planning loop, then inspect injuries after every deployment. Keep a reserve option in mind before sending a key Operator into a mission with a high risk of damage. Use the Medbay and other Den facilities before the tactical mission starts because the next Cycle begins after deployment resolves.
Keep familiar pairs together when Bond progress matters, recruit reserves when the Recruitment Facility allows it, and review Specializations when the respec option becomes available. These are planning aids, not guarantees of one best campaign route. The exact unlock timing and the best order for every facility are To be confirmed.
The core habit is simple. Read the objective, inspect the strategic board, check the squad, spend or protect Intel deliberately, and launch only after deciding what the next Cycle should accomplish. That routine keeps the strategic choice and the tactical turn connected without relying on an unverified campaign total.
Related articles
missions
Star Wars Zero Company Storm Basin Mission Guide
Learn how the Storm Basin rescue mission works in Star Wars Zero Company, including the Runa trigger, six civilians, six-turn objective, and route limits.
missions
Our Jedi Friend Operation Guide
Find the verified Our Jedi Friend choices, requirements, Intel cost, availability, and Smugglers' Den connection in STAR WARS Zero Company.
missions
Star Wars Zero Company Anaxes mission guide
Explore Star Wars Zero Company Anaxes missions, including Buy Cheap, Never Sleep, Kabb's required objective, Holotable access, rewards, and failure checks.
Was this helpful?
Thanks for the feedback.