
Star Wars Zero Company Serolonis mission guide
Explore Star Wars Zero Company Serolonis missions, including The Serolonis Job, Dead Metal, the Droideka shield route, reinforcements, and objectives.
The direct answer
Star Wars Zero Company Serolonis is the setting for the opening mission The Serolonis Job. The mission board describes that job as stealing a mysterious holopuck from a Separatist informer’s safe, and the walkthrough places it first in the 13-entry main route. Serolonis also has the recorded Dead Metal tactical mission, where every Separatist unit and both reinforcement waves must be defeated.
The planet’s other board entries include Cly Kullervo’s Hero mission Without Honor or Humanity and optional work such as Cutting-Edge Tech, Red Dust, High Noon, Droid in Danger, and Disruptive Shots. The exact mission availability, full reward table, and relationship between every board entry and the current release build are To be confirmed.
The Serolonis Job
The main-story board lists The Serolonis Job as OP-001 and gives it a one-turn field on the campaign list. Its short objective is to steal the Separatist holopuck. The board summary is enough to identify the mission, but the active Holotable briefing should be opened before deployment because it can contain more detailed success and failure conditions.
The job introduces the campaign’s relationship between The Den, the Holotable, and the battlefield. The Den’s Holotable connects Tactical Missions and Operations, and completing a Mission advances the company to the next Cycle. Finish conversations, recovery, recruitment, upgrades, and relevant Operations before launching the first mission.
Serolonis is one of the tactical mission planets. A separate game feature places it in the early campaign, while the mission board supplies the concrete holopuck objective. The exact map layout, enemy roster, and first-mission route are To be confirmed.
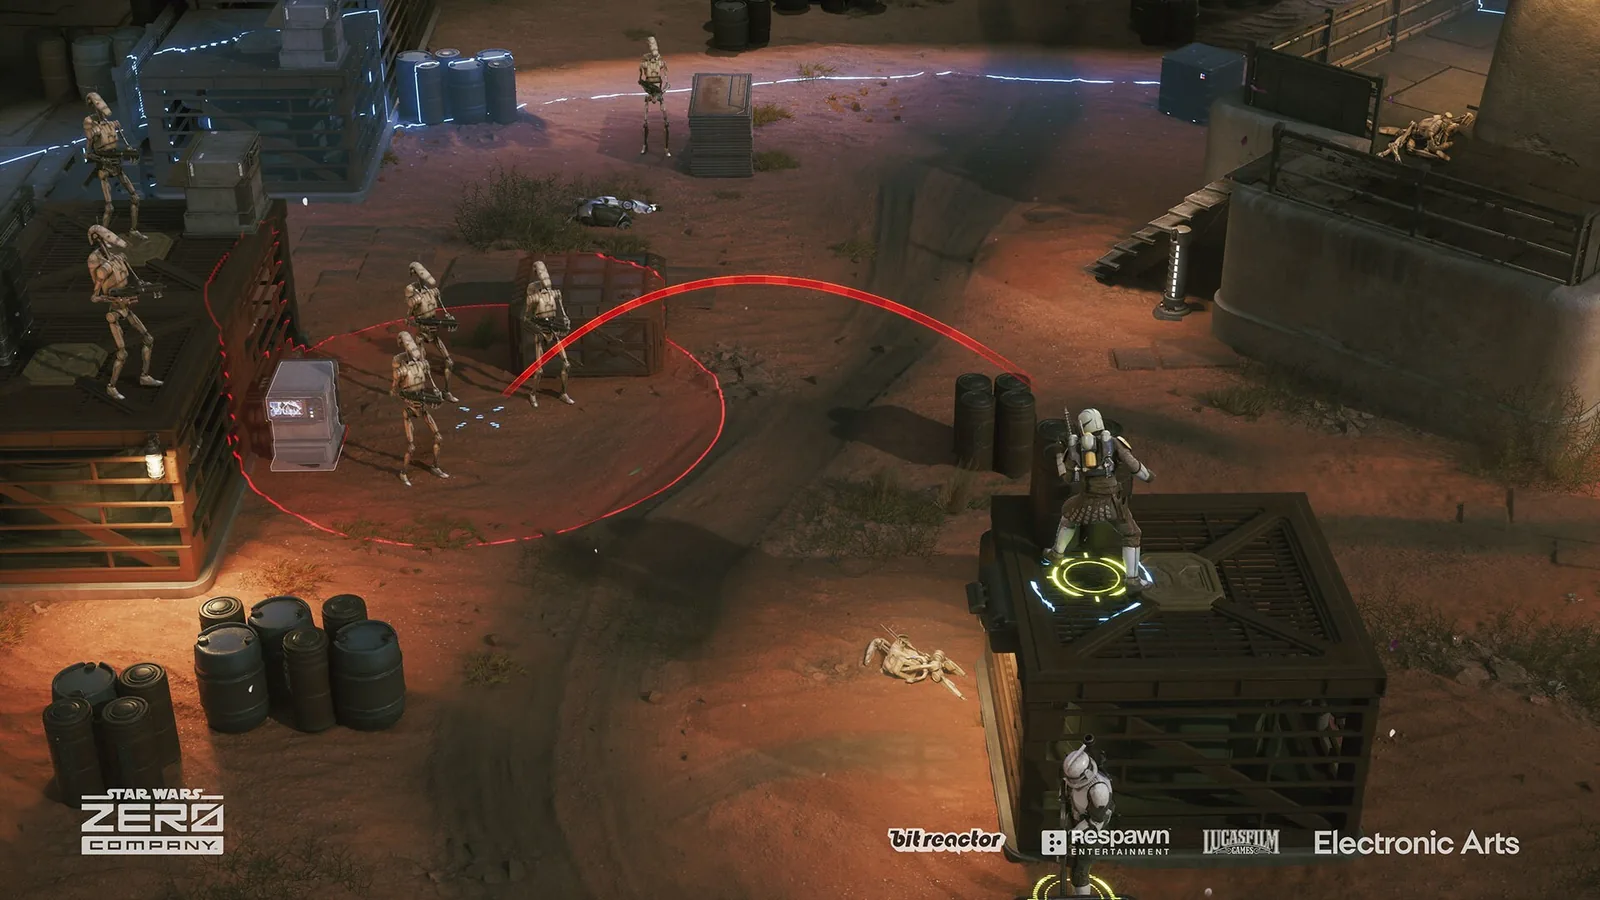
Dead Metal objective
The recorded Dead Metal guide places the mission in the Jedi Undercover chapter and describes it as a straight elimination fight against a Separatist garrison. The objective banner reads Defeat the Separatist Forces with the sub-objective Eliminate All Hostiles. That wording changes the route because late reinforcements count toward the required clear.
The map is described with rooftops, a central doorway, and a heavily shielded Droideka. The guide’s recommended four-Operator group is Jae Mordant, Tel-Rea Voxoss, Tesh Hawks, and Trick. Tel-Rea provides Jedi mobility and cleanup, Jae and Trick supply area damage, and Hawks adds steady fire and backup assists.
This is a recorded composition rather than a mandatory squad. The important tactical jobs are area damage for clustered droids, a way to reach high ground, concentrated attacks for the Droideka, and enough control to hold the central doorway. Other Operators can be used, but every replacement is To be confirmed.
Rooftops and the Droideka shield
The guide opens by moving a clone trooper into cover with a clean line on a nearby B1 Battle Droid. Jae Mordant then uses Impact Bomb against the rooftop group, while Tel-Rea reaches a rooftop and uses Force Push to remove a B1. End the round with remaining Action Points on Overwatch so the enemy advance through the map costs them health.
The Droideka is the priority once its group is exposed. Its shield must be broken before the unit can be destroyed, so spread-out damage wastes a round. Clear nearby escorts with Trick’s Impact Bomb, then focus the squad and chain backup assists onto the Droideka in the same round.
After the shield falls, the guide uses Jae’s Ambush II to finish the Droideka. Tel-Rea can combine Lightsaber Strike and Shockwave II against a BX Droid Sniper and other survivors. The exact damage values, ability ranks, and action costs in another build are To be confirmed.
Hold the central doorway
After the first group is defeated, B1 Battle Droids and B2 Super Battle Droids arrive through a central doorway. The guide treats that doorway as a choke point. Reposition the clones to see the entrance, fire as the droids emerge, and let Overwatch take reaction shots while they cross the gap.
Do not chase the reinforcement wave into open ground. Let it enter the squad’s firing lanes, then send Tel-Rea to finish survivors with melee or Force abilities. The recorded guide calls Tel-Rea the safest Operator to leave near the doorway because she recovers health at the end of a round, but the exact recovery rule should be checked against the current build.
How to confirm Dead Metal success
The recorded run reports a five-round clear with 18 enemies defeated and 304 damage dealt. Those are the results of that run, not a universal target or a promise that every campaign uses the same enemy count. The mission succeeds when the last hostile falls and the MISSION SUCCESS screen replaces the tactical view.
If the screen does not appear, search the map for a survivor from the second doorway wave. Splitting attacks can leave the Droideka shield intact, while standing in the open can give a BX Droid Sniper a free shot. A mission can be restarted from the game menu.
Other Serolonis entries
The mission board lists Without Honor or Humanity as Cly’s Hero mission on Serolonis. It lists Cutting-Edge Tech as a contract involving experimental reactor technology, Red Dust as a weapons recovery job, High Noon as a Separatist presence, and Droid in Danger as an astromech recovery mission. Disruptive Shots is listed as a prototype-related objective.
Those entries show why the Serolonis label does not define one tactical plan. Read the mission type, target, timer, and failure condition on the Holotable. The full order and detailed route for the other Serolonis entries remain To be confirmed.
Related articles
missions
Star Wars Zero Company Storm Basin Mission Guide
Learn how the Storm Basin rescue mission works in Star Wars Zero Company, including the Runa trigger, six civilians, six-turn objective, and route limits.
missions
Our Jedi Friend Operation Guide
Find the verified Our Jedi Friend choices, requirements, Intel cost, availability, and Smugglers' Den connection in STAR WARS Zero Company.
missions
Star Wars Zero Company Anaxes mission guide
Explore Star Wars Zero Company Anaxes missions, including Buy Cheap, Never Sleep, Kabb's required objective, Holotable access, rewards, and failure checks.
Was this helpful?
Thanks for the feedback.